DIY: Circle loom weavings
A tutorial to make simple circular weavings, especially for our yarn tapestry
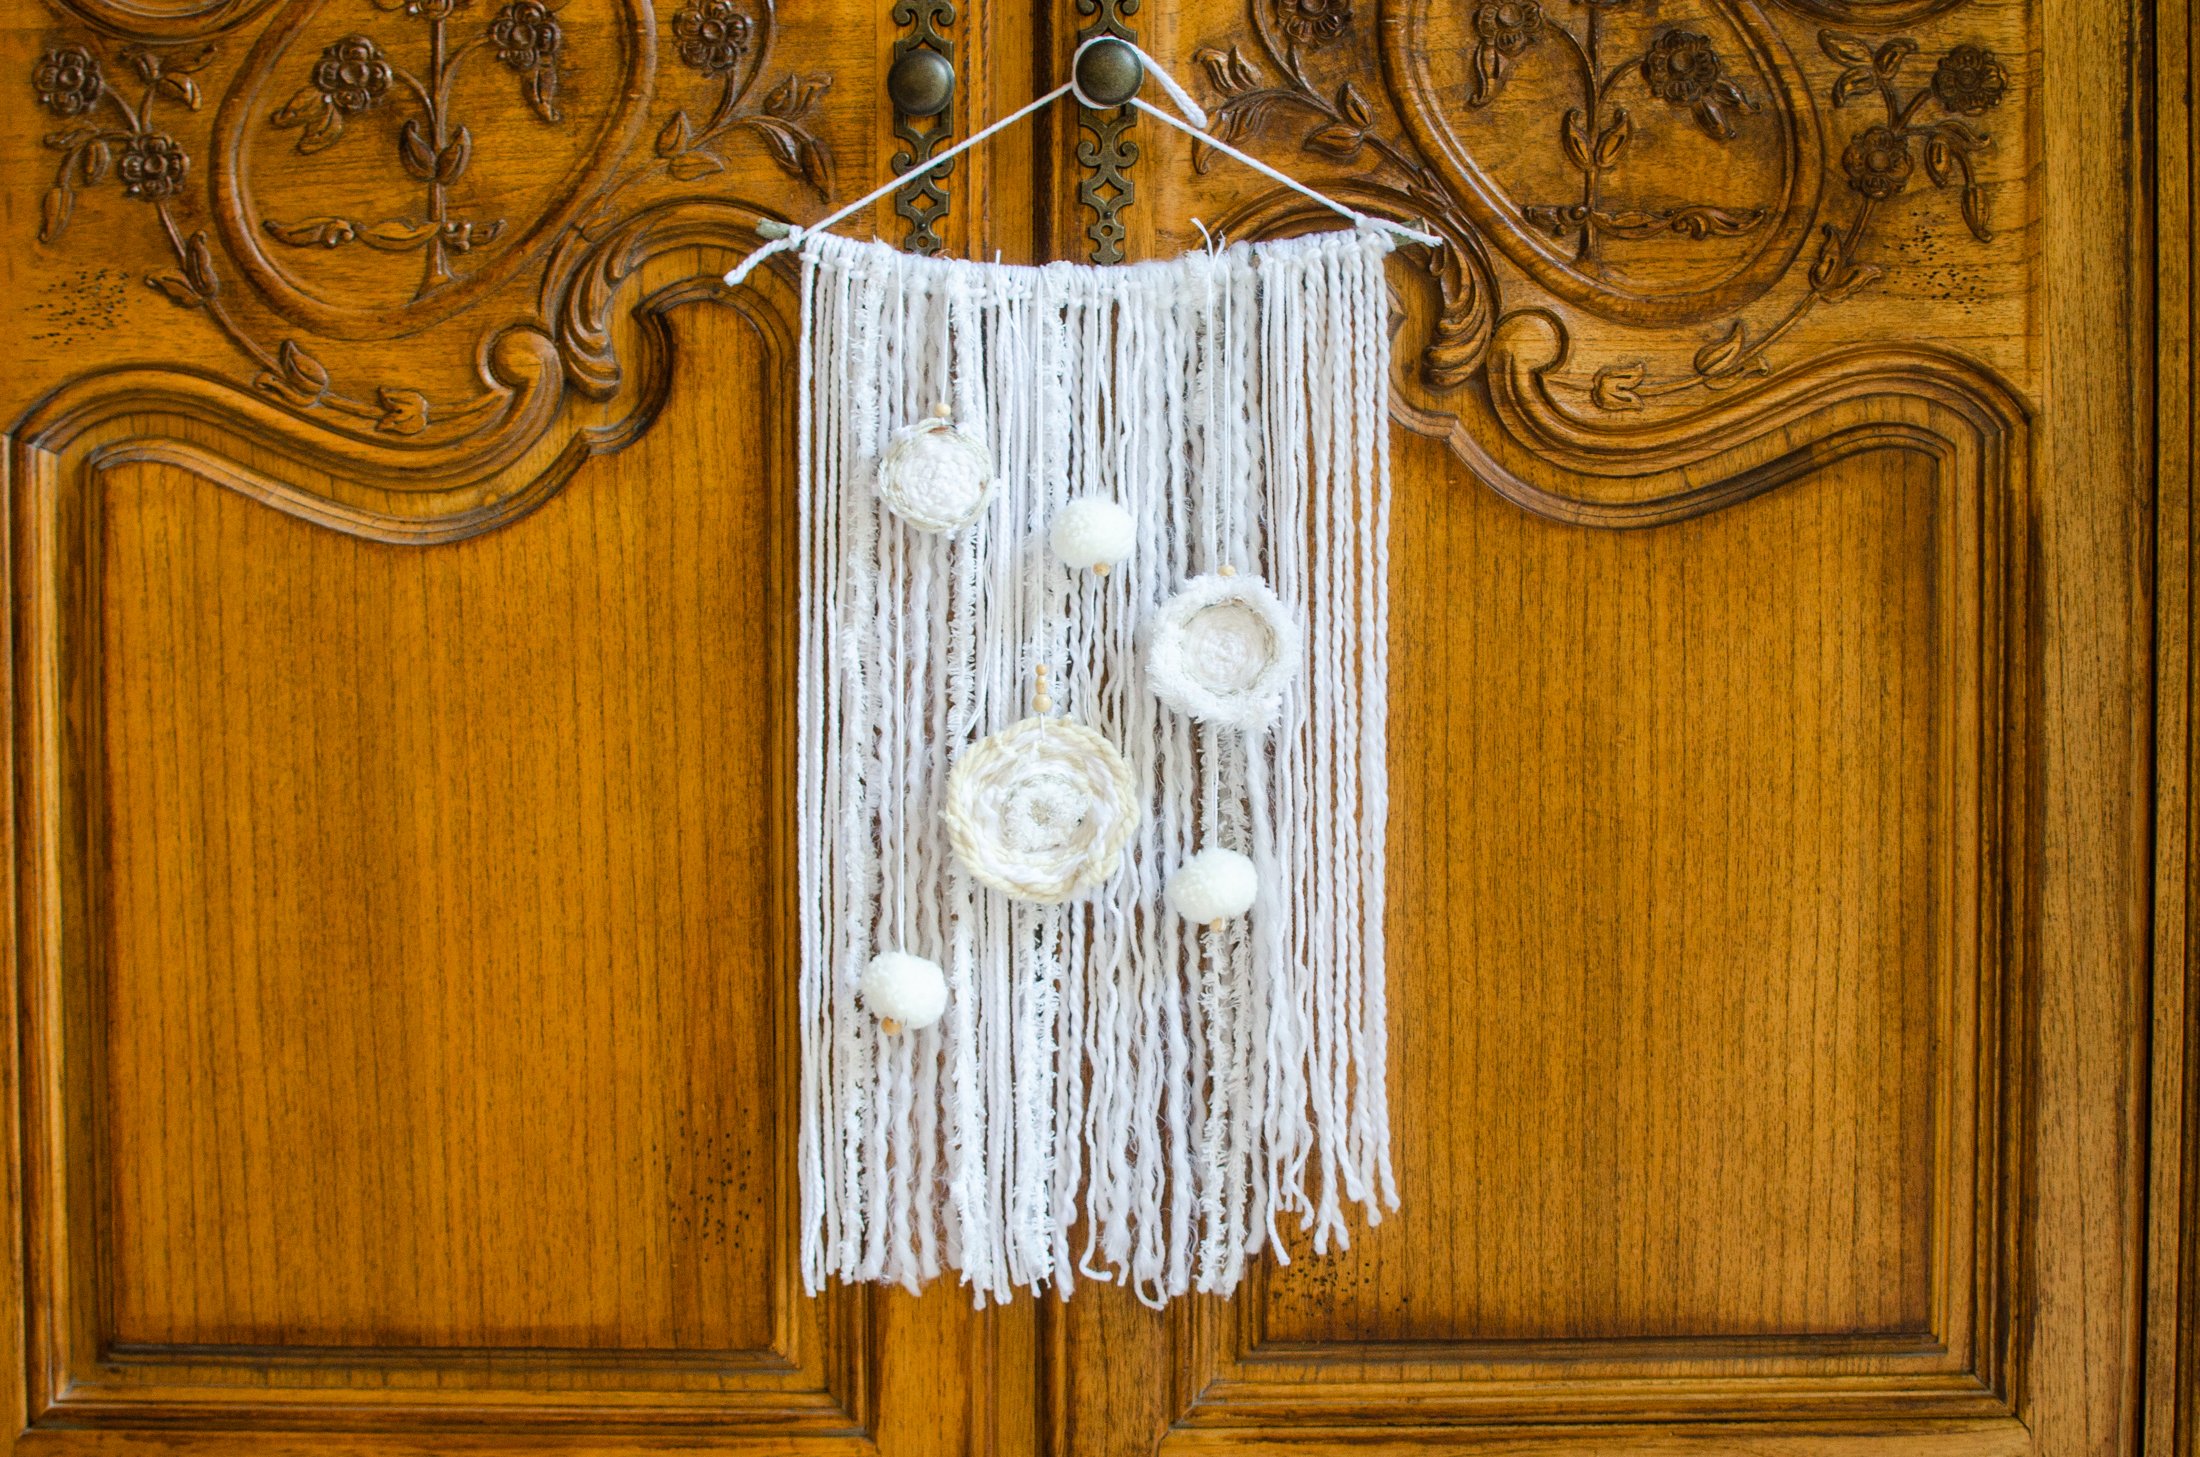
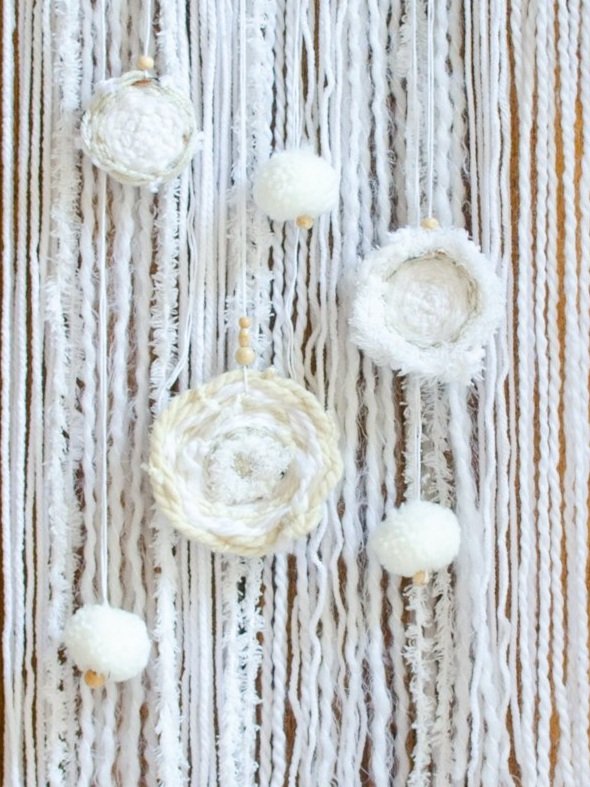
This is a special tutorial to make circle weavings from cardboard that look a little bit like snowflakes! We loved using them in a yarn tapestry to celebrate the arrival of winter and the new Hebrew month of Tevet on the Jewish calendar. Circular weavings are a perfect craft for winter. They also remind us that the seasons of the year go round and round!

Making a weaving on a circle loom is a new craft for me. A few years ago, I began weaving on cardboard looms, and loved the process so much that I bought a real (rectangular) loom (haha)! It’s so much fun to use yarn in different thickness and textures, and since we were making these weavings to resemble snowflakes, we used colors in different shades of white.

For these circular weavings, I used a small cardboard circles that actually came from the packaging of small trinket trays. They were just perfect - and bonus, reusing something that you would normally throw away is the Jewish valuey bal tashchit (not to destroy waste items that can be recycled).
These small weavings took less than 15 minutes each to make once the loom is made, and they are fun for grown-ups and kids alike! So let’s go make some circular weavings!
DIY Circle Weavings
Learn how to make a winter yarn tapestry here!
Circle weavings

Here’s what you’ll need to make your own circle weaving:
Cardboard circle (ours was small at 3 inches in diameter)
A variety of skeins of yarn in different textures and thickness. If you’re making “snowflakes” for winter, we suggest white and offwhite colors
Scissors
Large eye plastic needle
Pencil, ruler and tape (optional)
Here’s how we made our circle weaving::
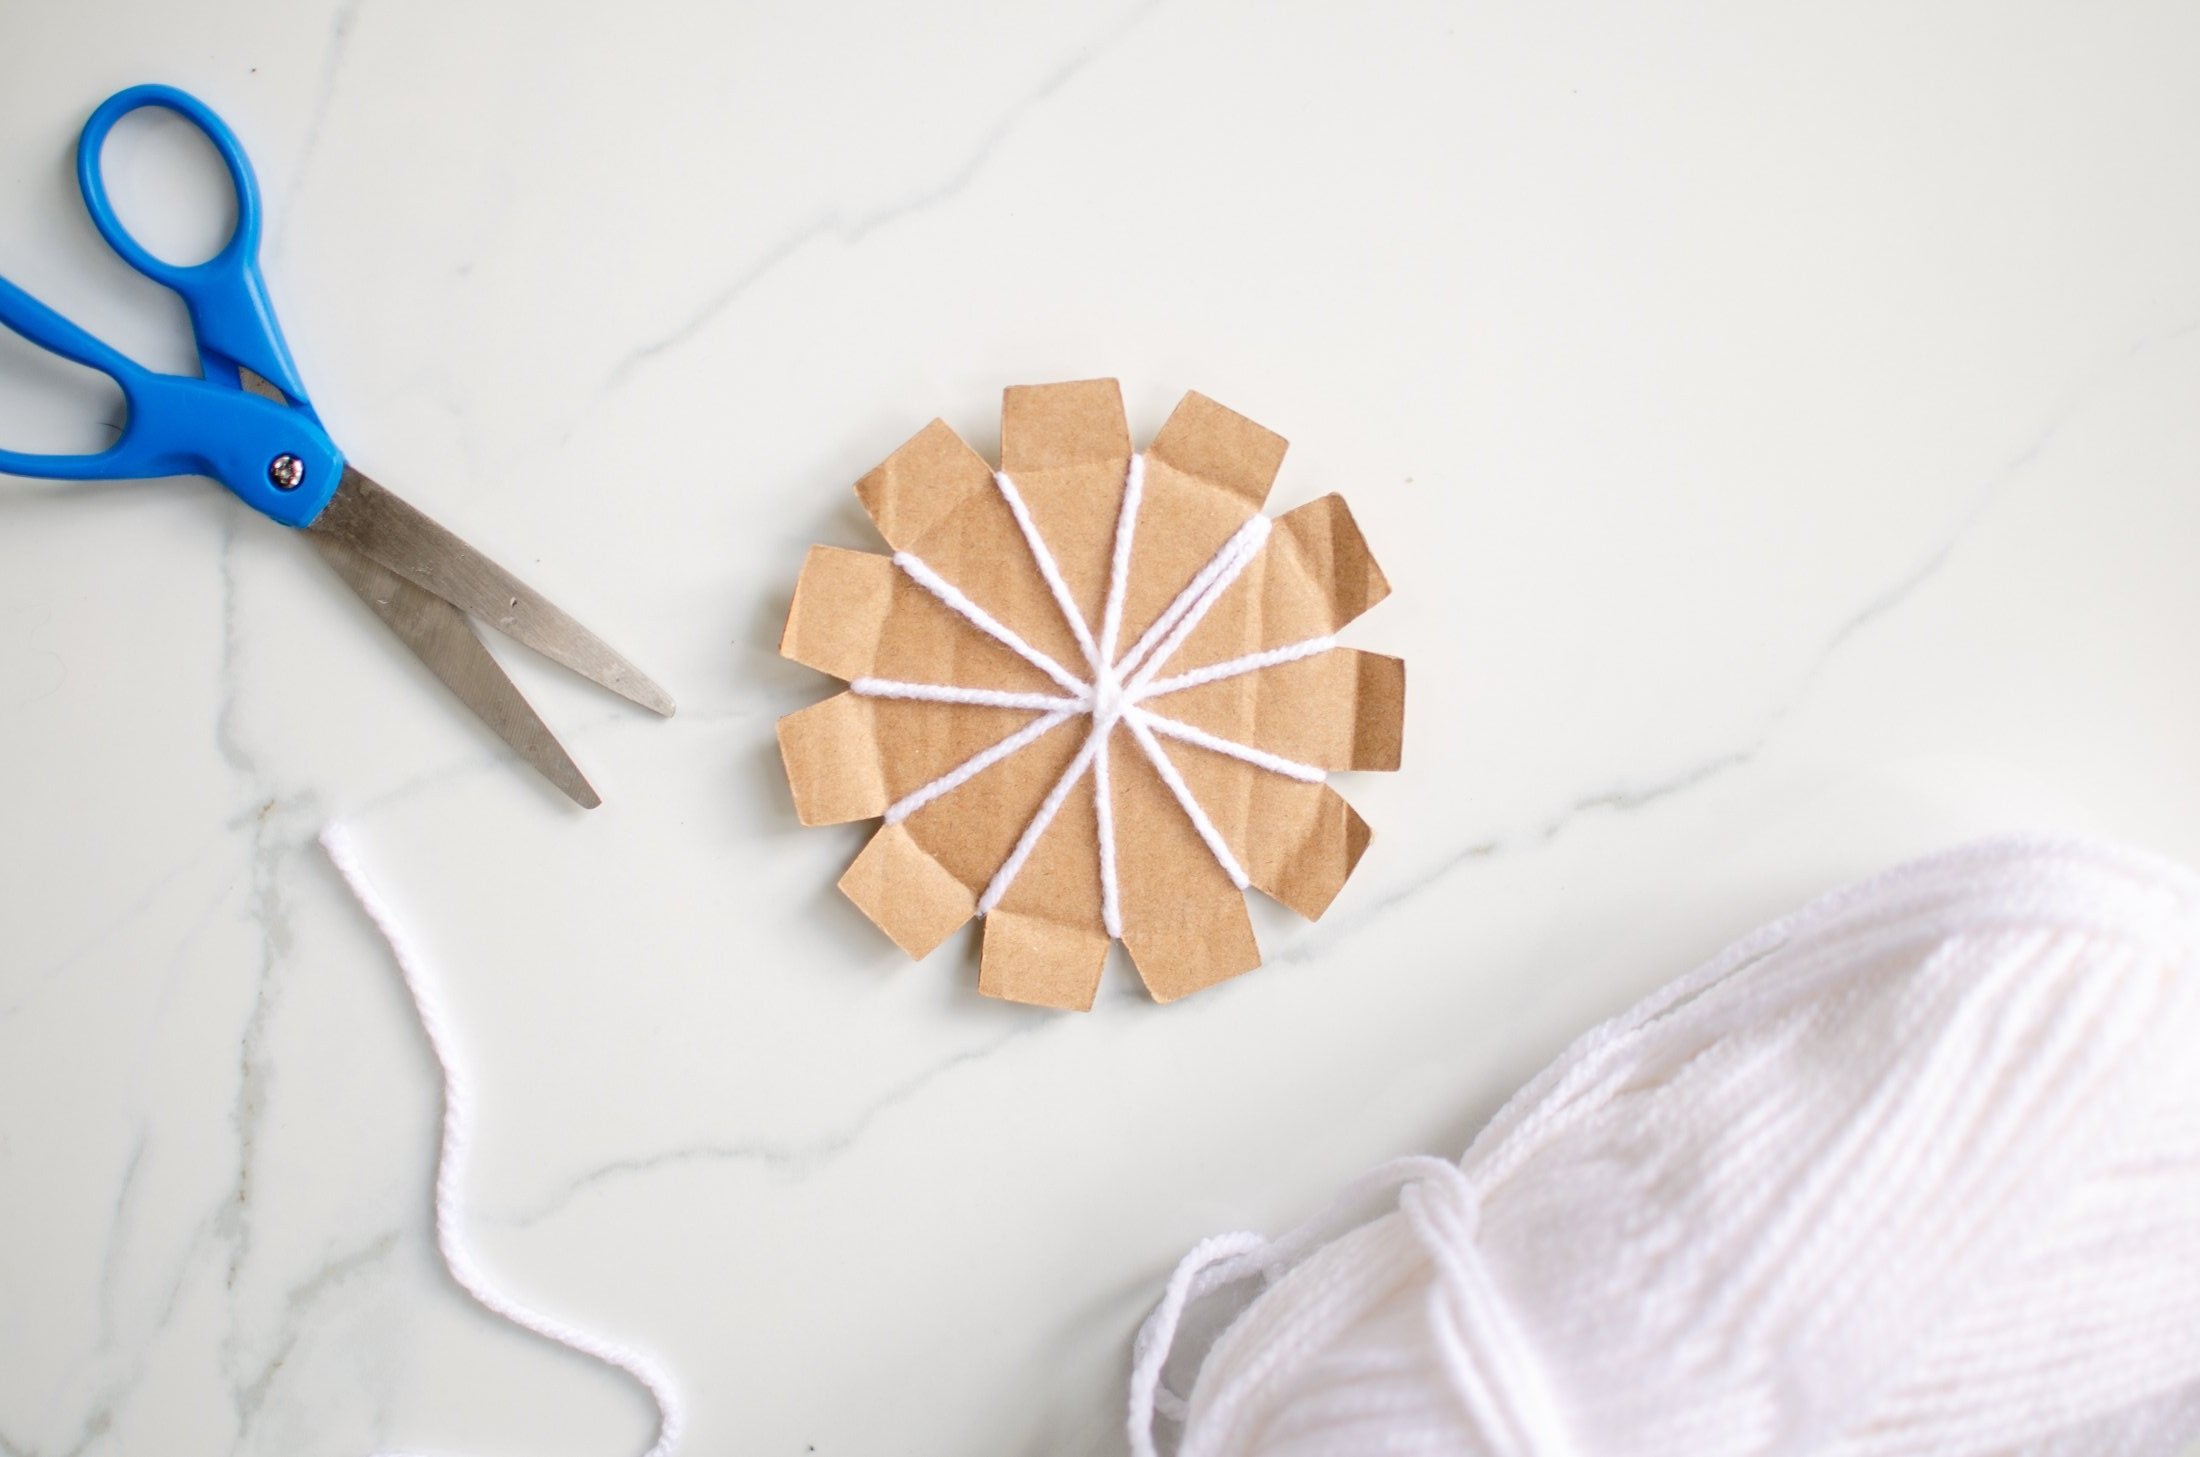
1. Take a cardboard circle and make cuts or notches evenly spaced going all the way around the edge of the circle (you can eyeball it or be more precise with a pencil and ruler - it’s up to you). It’s best to make an odd number of notches.

2. Let’s “warp” the loom. Cut a long piece of yarn and hold one end on the backside of the loom (if you’d like you can tape it down). Bring the strand to the front and securing it in a notch. Pull the yarn directly across to the notch opposite and secure it in place. Continue wrapping your yarn all the way around the loom in this manner. The last notch will be on top of a notch that’s already been used (it will look like 2 strands of yarn, but treat it as one strand in your weaving). To finish the warp, tie both ends with a knot in the back of the loom.
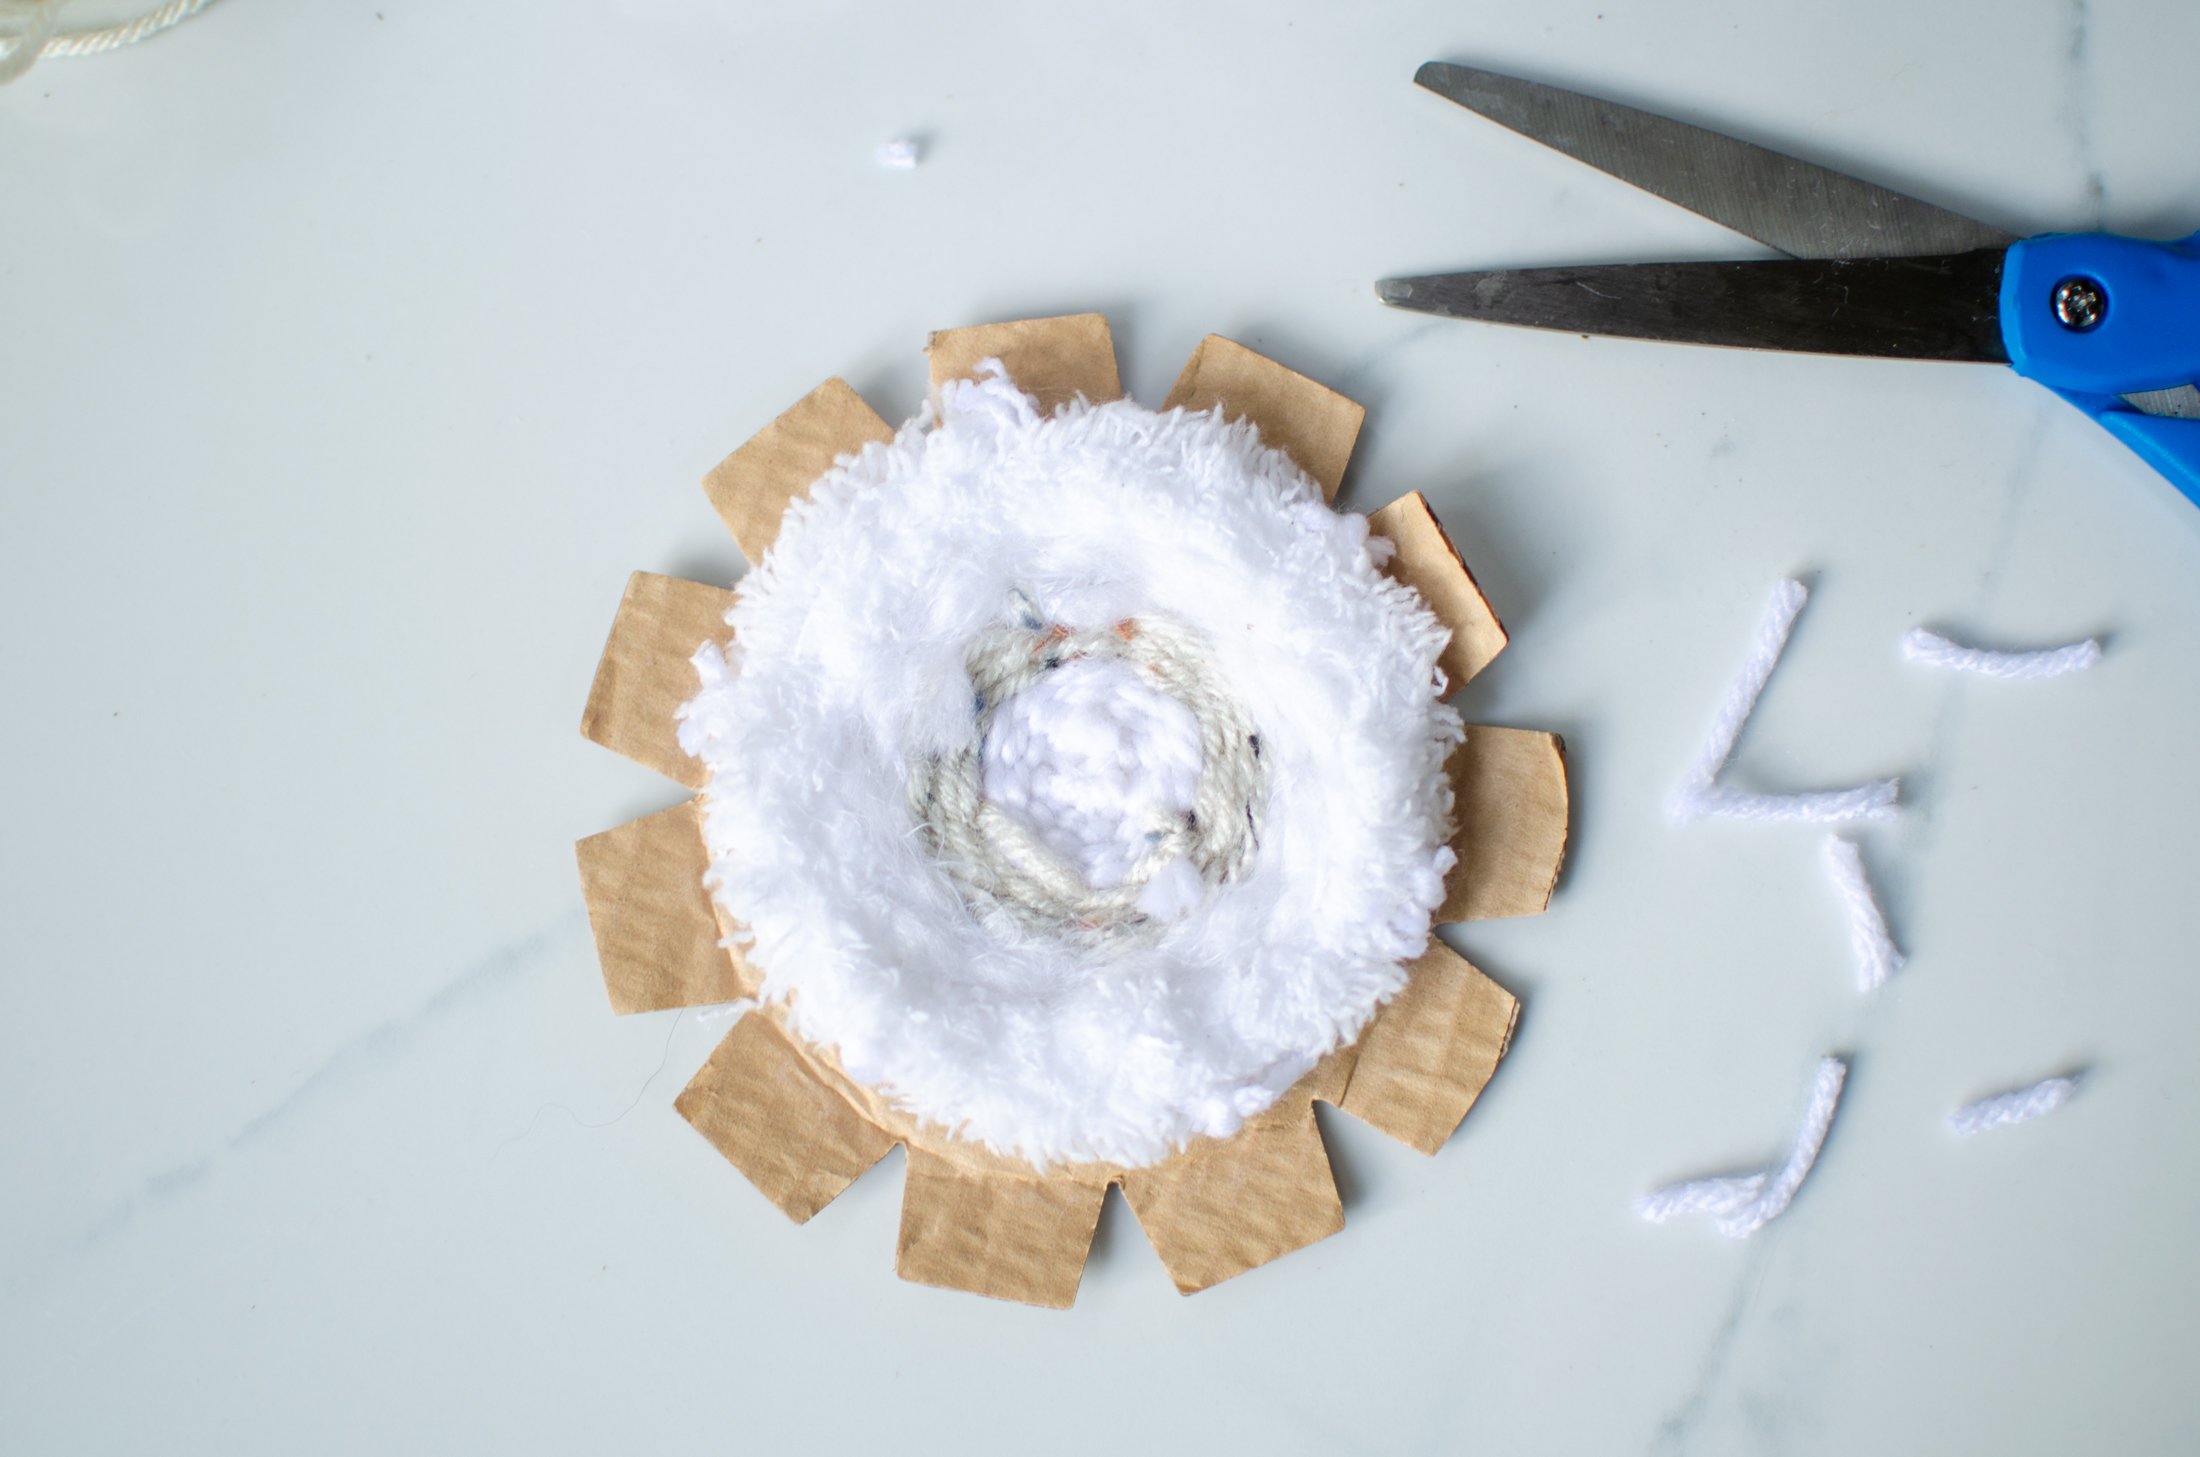
3. It’s time to start weaving! Place a strand of yarn in the eye of a needle, and bring it to the center of your loom. Leave the little tail end sticking up. Pull it under one of the strands of yarn, and then weave over and under going all the way around the middle.

4. When you’re ready for a color change, snip a new length of yarn, and tie the end to the first piece. (all these ends will be snipped at the end). Continue weaving in and out all the way around the circle (ignoring the little tails of yarn that are sticking up).

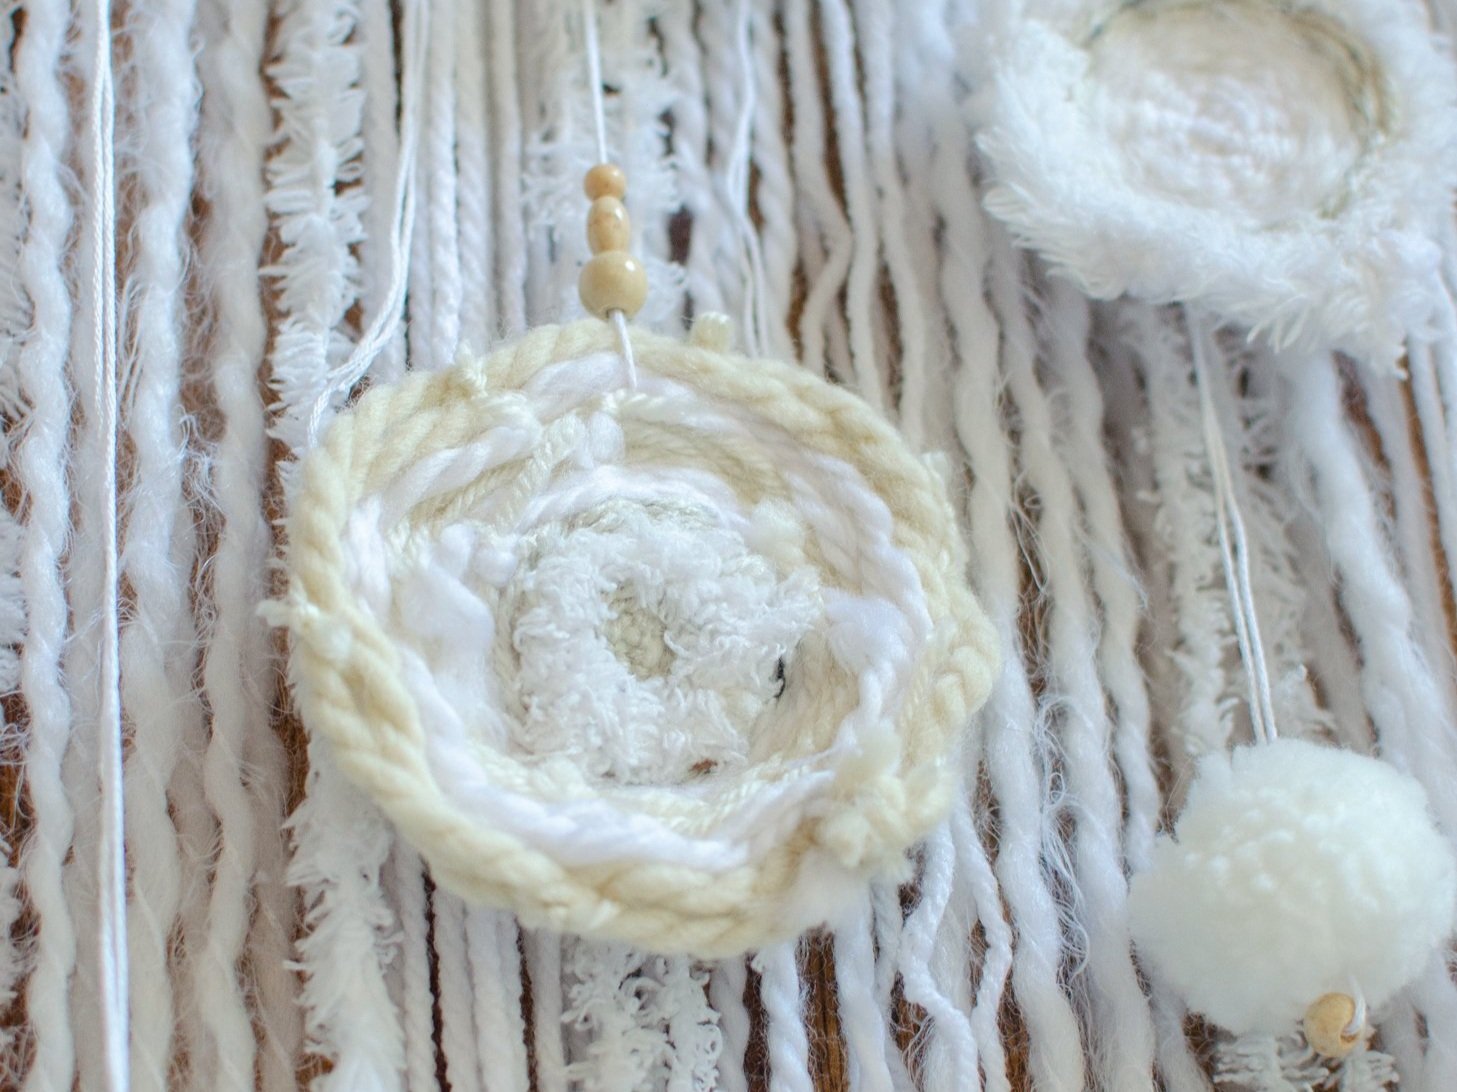
5. When your circle is all filled up, fip your loom over and snip the ends in the middle.

6. Flip it back over, and tie two ends that are closest together with a knot, going all the way around the circle.


7. Snip away all the little tails on the outside of the circle and also on the inside. You can flip your weaving over and decide which side you’d like to have as your “face” (the side that shows).
We loved making using these circular “snowflake” weavings in our winter yarn tapestry. We ended up making three in different sizes. You don’t have to make a smaller loom, just end your weaving before the loom gets all filled up with yarn.
Learn how to make a winter yarn tapestry here!
I loved making these circular weavings. They were so perfect for our winter yarn tapestry, and next time we have a snowy day, I might string them up in a winter wonderland garland or make some coasters for mugs of hot chocolate! What do you think they would be good for?
If you’re looking for more crafts to celebrate Tevet and winter for you and your littles, see our winter yarn tapestry (it looks like icicles), DIY Baby Goat Snowglobe (find out why goats are a special during Tevet), DIY Edible Snowflakes and our complete Winter Round-up.
We have so much to look forward to this winter! Next month is the Jewish holiday, Tu B’Shevat, the birthday of the trees, and if you want to start thinking about getting ready for this holiday, visit our Tu B’Shevat Round-up!
Stay warm and cozy,
~Jennifer

Tutorial to make pom pom “snowballs” here!